Create New Access Application Link
An access application link allows you to define a series of pages that will collect information from data providers. You can then send the link with data providers, use a QR code, or embed the link in your webpage.
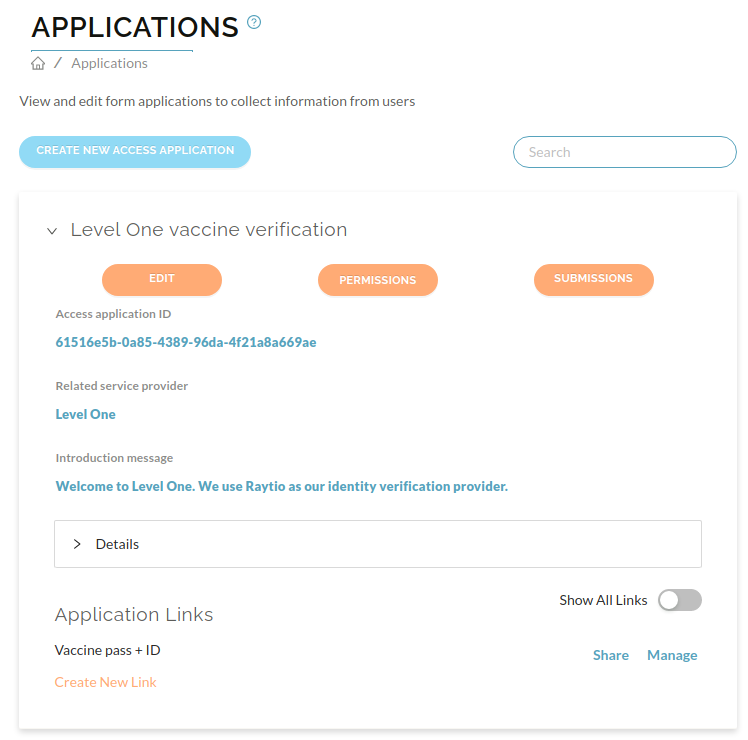
- Navigate to your access application, press the dropdown arrow and scroll down to the bottom, and click on Create New Link in the bottom left corner
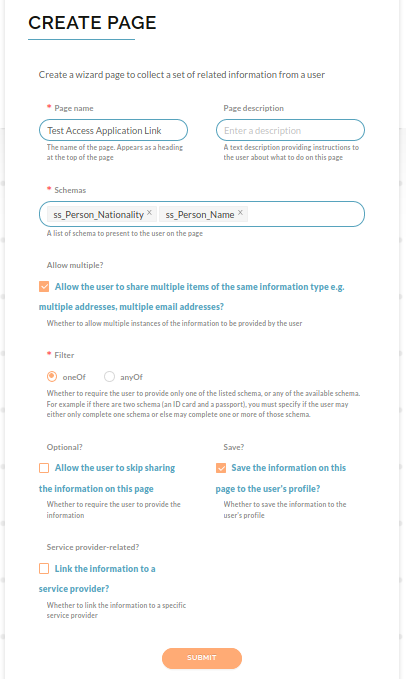
- Specify the information that you want to collect on the first page of the form that the data provider will be presented with:
| Name | Description |
|---|---|
| Page name | The name of the page. Appears as a heading at the top of the page |
| Page description | A text description providing instructions to the user about what to do on this page |
| Overide description | Whether to override the description on certain pages |
| Schemas | A list of schema to present to the user on the page |
| Allow multiple | Whether to allow multiple instances of the information to be provided by the user. For example, if you are asking for address information on this page, then you may wish to allow the user to provide multiple addresses. If Allow multiple is not selected then the user amy only provide one set of information of this type on this page |
| Filter | Whether to require the user to provide only one of the listed schema, or any of the available schema. For example, if there are two schema (an ID card and a passport), choose oneOf if the user may only complete one schema (i.e. only the ID card OR the passport) or choose anyOf if the user may complete one or more of those schema (i.e. the ID card AND/OR the passport). |
| Optional | Whether to require the user to provide the information on this page. Select if you wish to allow the user to skip this page. |
| Save | Whether to save the information to the user's profile. Usually you would want to select this so that the user can use the information in the future when sharing their information with other applications. However if the information is only relevant to this particular application instance then do not select this. Some examples of questions that shouldn't be saved on the user's profile: "What is the purpose of this loan?", "Please tick to acknowledge you have read our terms and conditions" |
| Service provider-related | Whether to link the information to a specific service provider. Select this if the information relates to your relationship with the data provider. Some examples of questions that are service provider-related: "Please indicate if you wish to receive marketing material from us", "Enter your customer number" |
| Schema description | Whether to display the schema description |
| Field title | Whether to display the field title |
| Field description | Whether to display the field description |
| Create new text | The text to display on the create new button |
| Reverify header | The header text to display on the reverify page |
| Reverify text | The text to display on the reverify page |
| Whether to share profile data, verifications, or both | The information to share |
| Selection heirachy | The json document that describes the selection heirachy for multiple schema |
| Fields to share | A list of fields to be shared with the access application |
| Verify | Whether to verify the data or not |
| Display mode | Which display to set for this page |
Once you have filled out the form, click Submit
note
You may want to create multiple pages as the settings for one page applies to all the schema on that page
Click the "Add another access application page" button to continue adding access application pages.
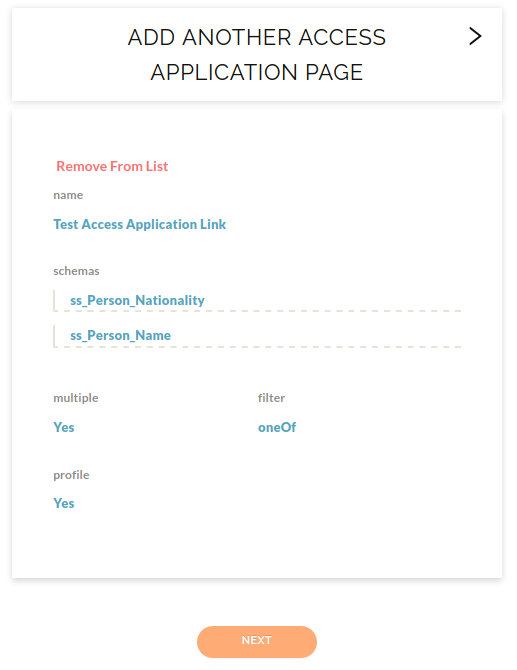
Once you have created all the desired pages press Next to continue.
Configure your form by customizing the wizard review page, then click Create
| Name | Description |
|---|---|
| Review text | The text to display on the review screen |
| Submit text | The text to display on the submit button |
| Default expiry date | The number of days in the future to set the expiry of the shared data |
| Allow reference update? | Whether to let the user update the reference if one has been provided |
| Return to URL | The URL to redirect the user to |
| Email report to | The email address to send the report to |
| Quick onboard | When a new user is sent a link should they be automatically signed up? If they are not automatically signed up then the user is required to enter a pasword and verify their email before starting to complete the forms. Note if true then a service provider must be set against the Access Application |
| Sharing data message | The message to display to users when the timer is activated during sharing |
| Relationships | The relationships to create between profile objects |
To check your link has been created, navigate to Applications in left hand corner, and you should see your newly created link