Configuring directory sync with G Suite (Google)
This article will cover how to connect the SecretSafe Directory Connector application to your G Suite directory.
Requirements
- Read through the following article: Syncing users and groups with a directory
- Install SecretSafe Directory Connector
- Using Directory Connector, log into your SecretSafe account and select your organization
Table of Contents
- Requirements
- Table of Contents
- Create a Google Cloud Project
- Enable the Admin SDK API for Your Project
- Create & Configure a Service Account
- Configure G Suite Security
- Configure Directory Connector
- Testing
Create a Google Cloud Project
If you already have a Google Cloud project available, you can skip this step and re-use it here.
- Go to https://console.cloud.google.com/home
- Click the Create project button
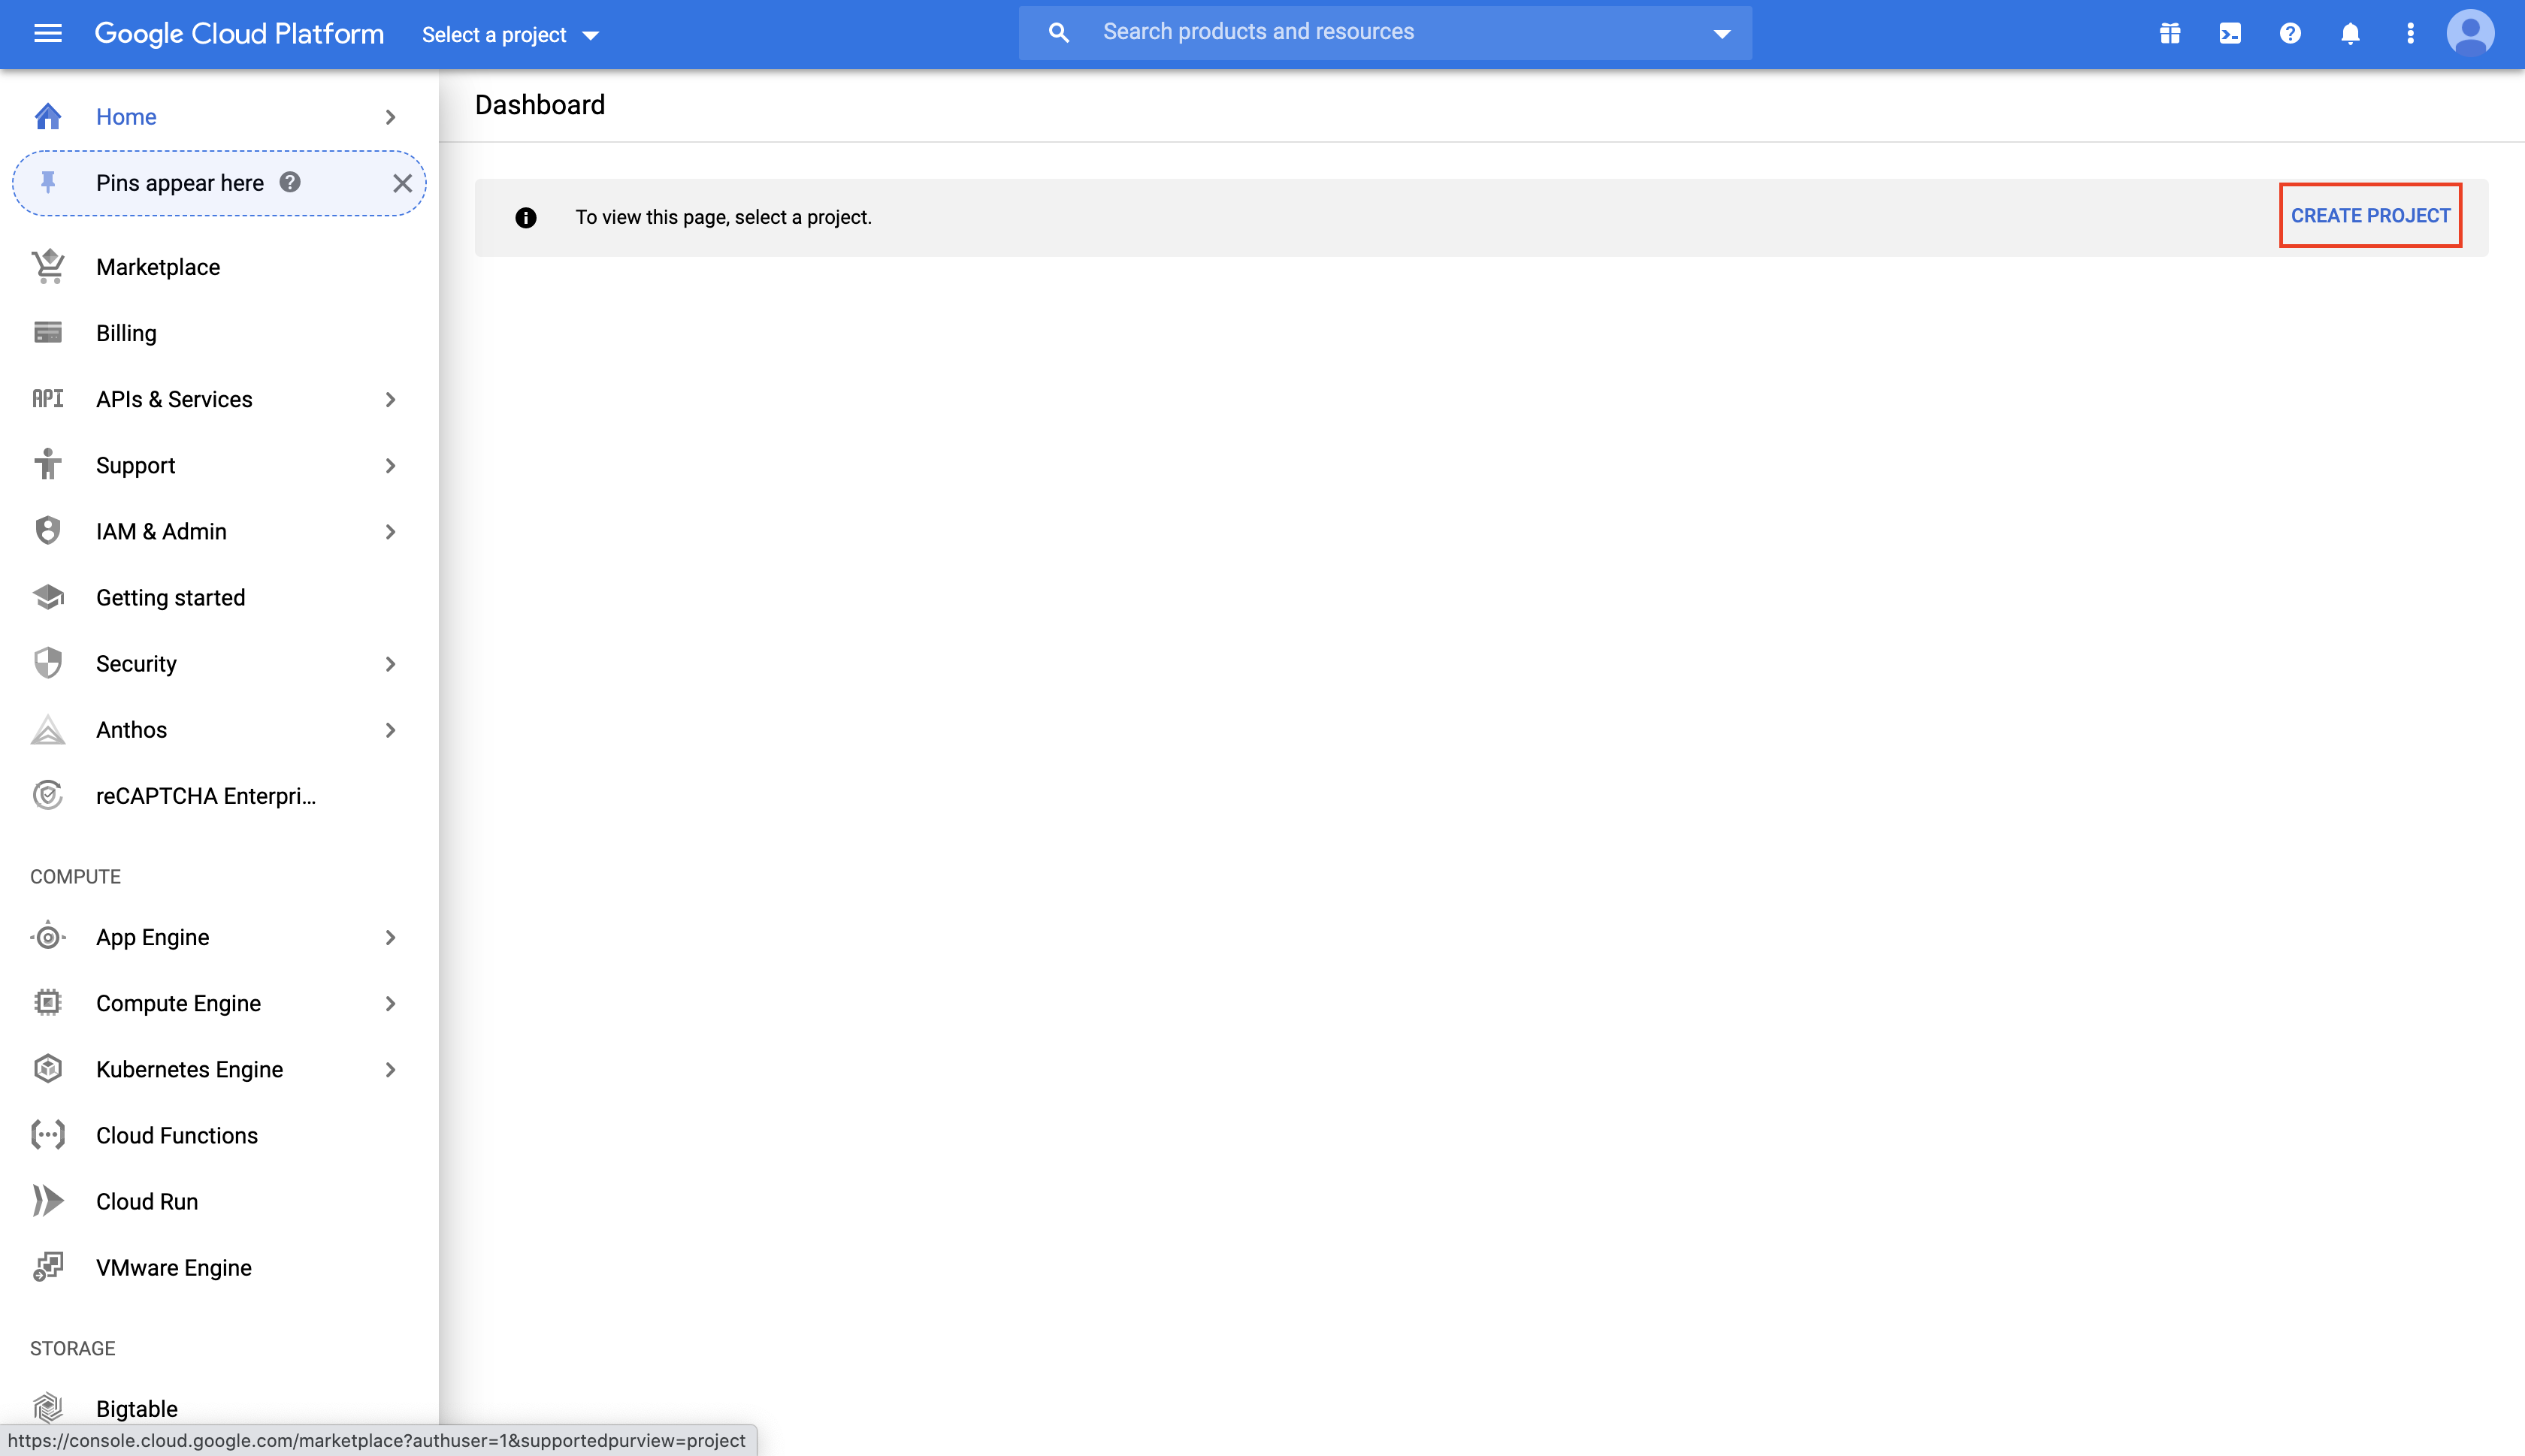
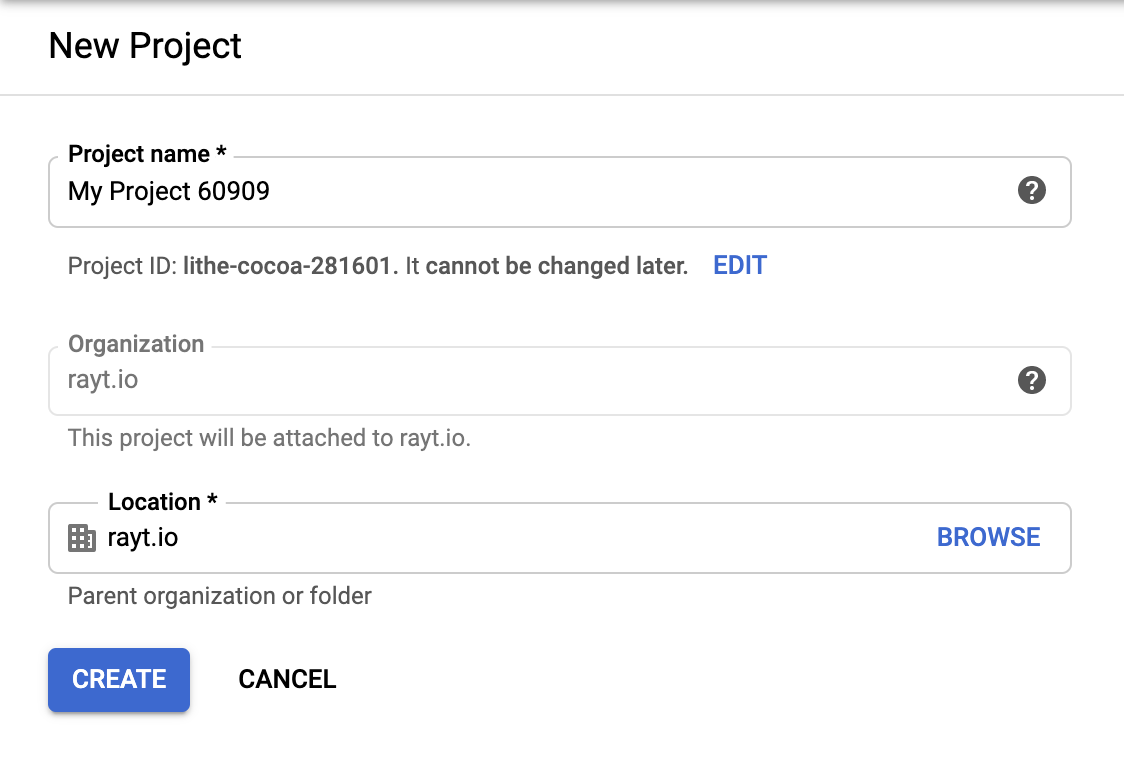
- Enter a project name and click Create
- Refresh the page and you should now see your project
Enable the Admin SDK API for Your Project
- Go to https://console.cloud.google.com.
- Make sure the appropriate project is selected. You should be on the Dashboard page for your project.
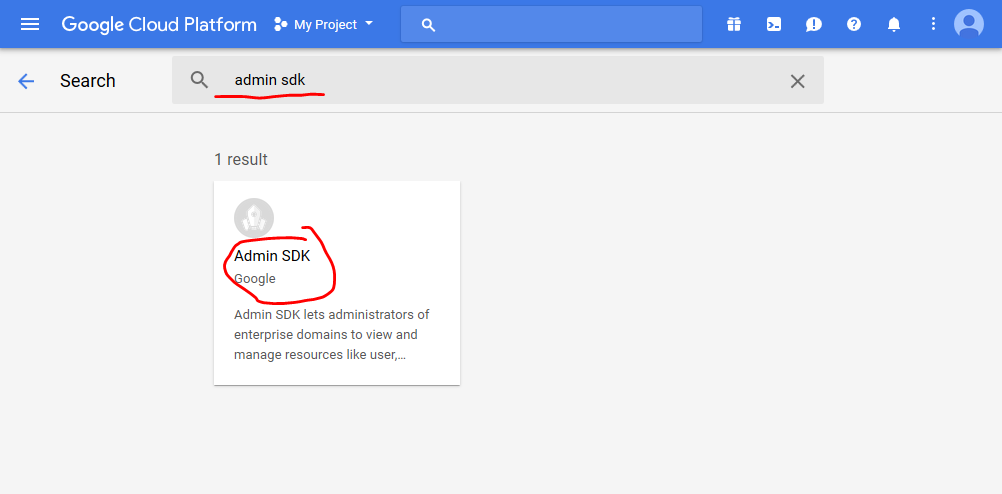
- Open the navigation menu and navigate to APIs & Services → Library.
- Search for and select the Admin SDK service.
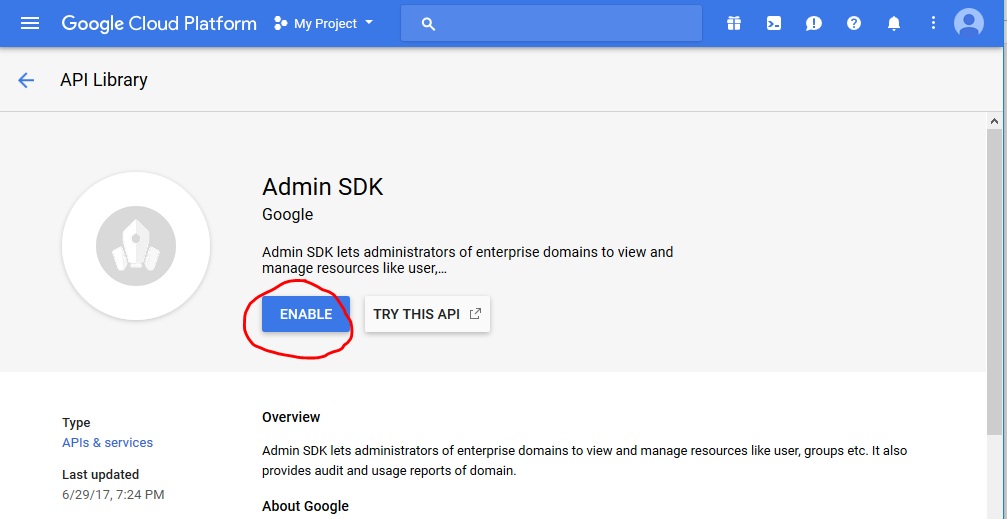
- Click the Enable button near the top.
Create & Configure a Service Account
Make sure the appropriate project is selected. You should be on the Dashboard page for your project.
Open the navigation menu and navigate to APIs & Services → Credentials.
Click the Create credentials button and select Service account key.
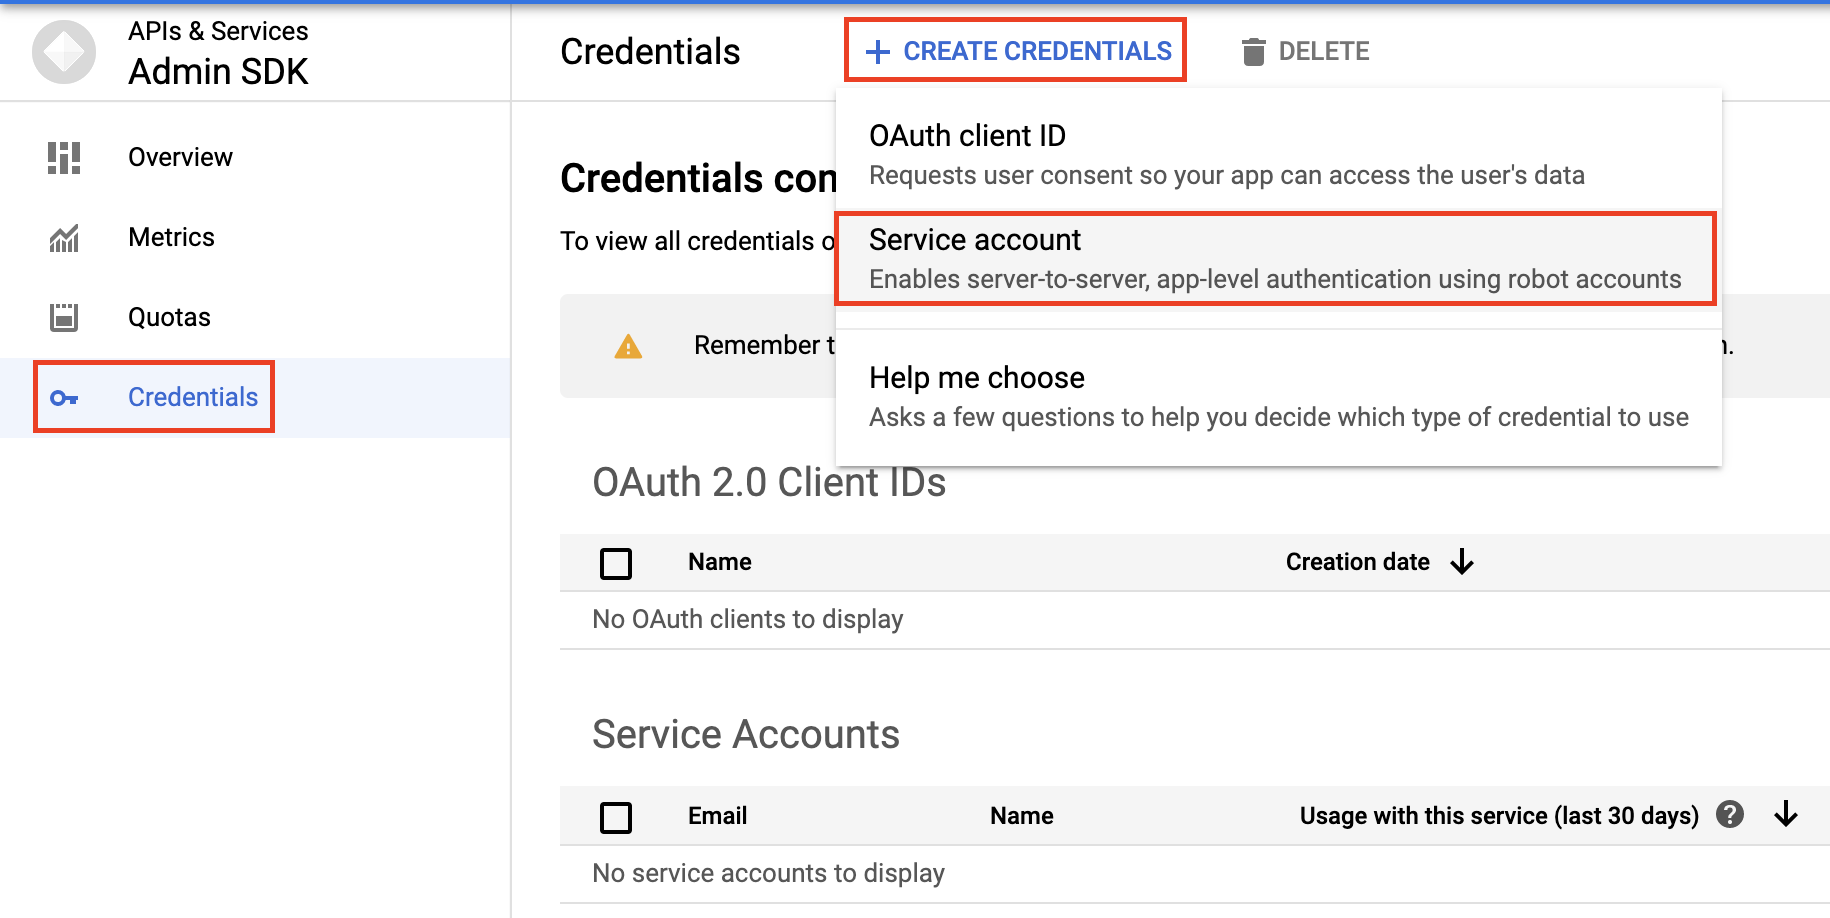
Select New service account from the Service account dropdown menu.
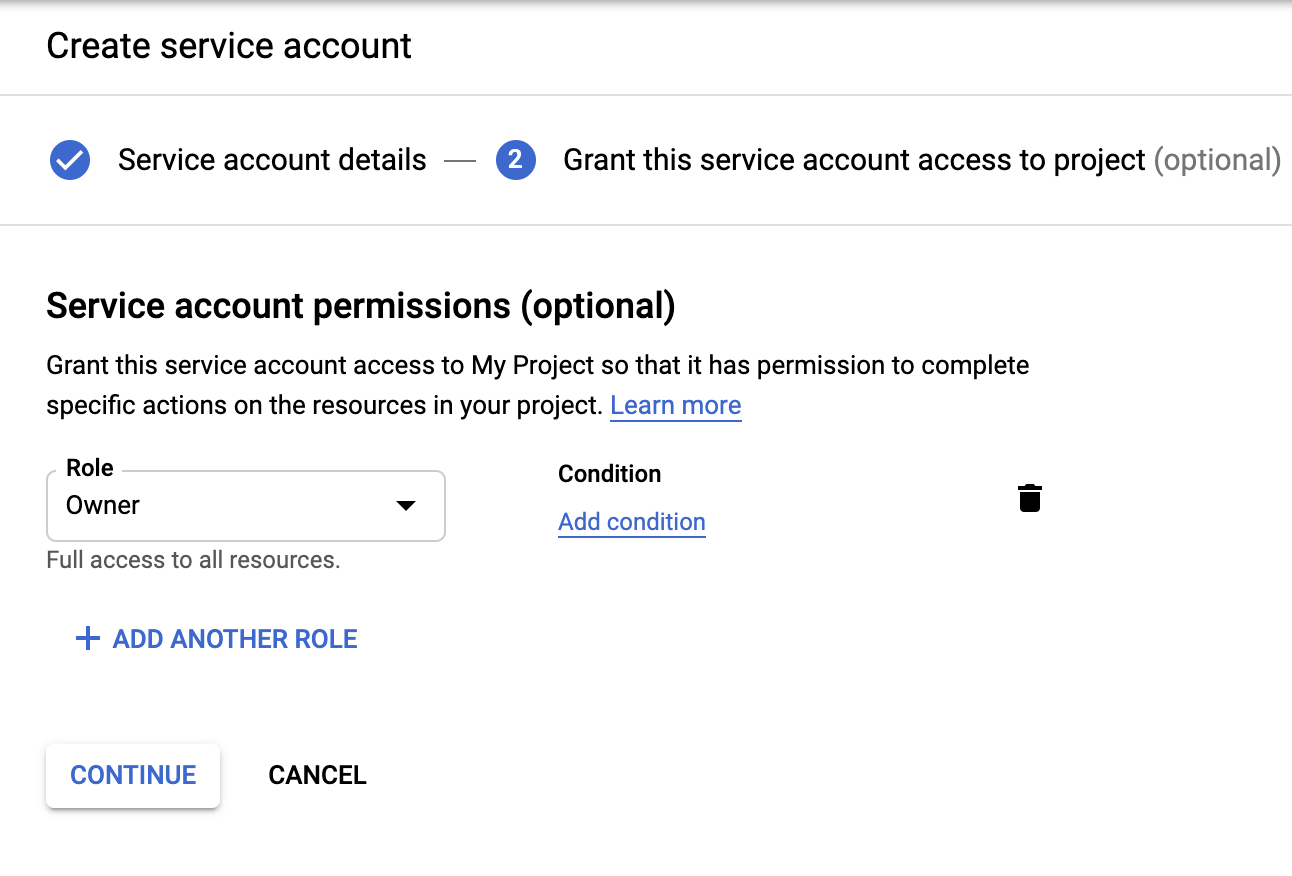
Name the service account SecretSafe Directory Connector, then click Create. For the role, select Project and then Owner. Leave Grant users access to this service account blank, then click Done, a JSON file will be downloaded; this is important for later so keep a note of where you have downloaded it.

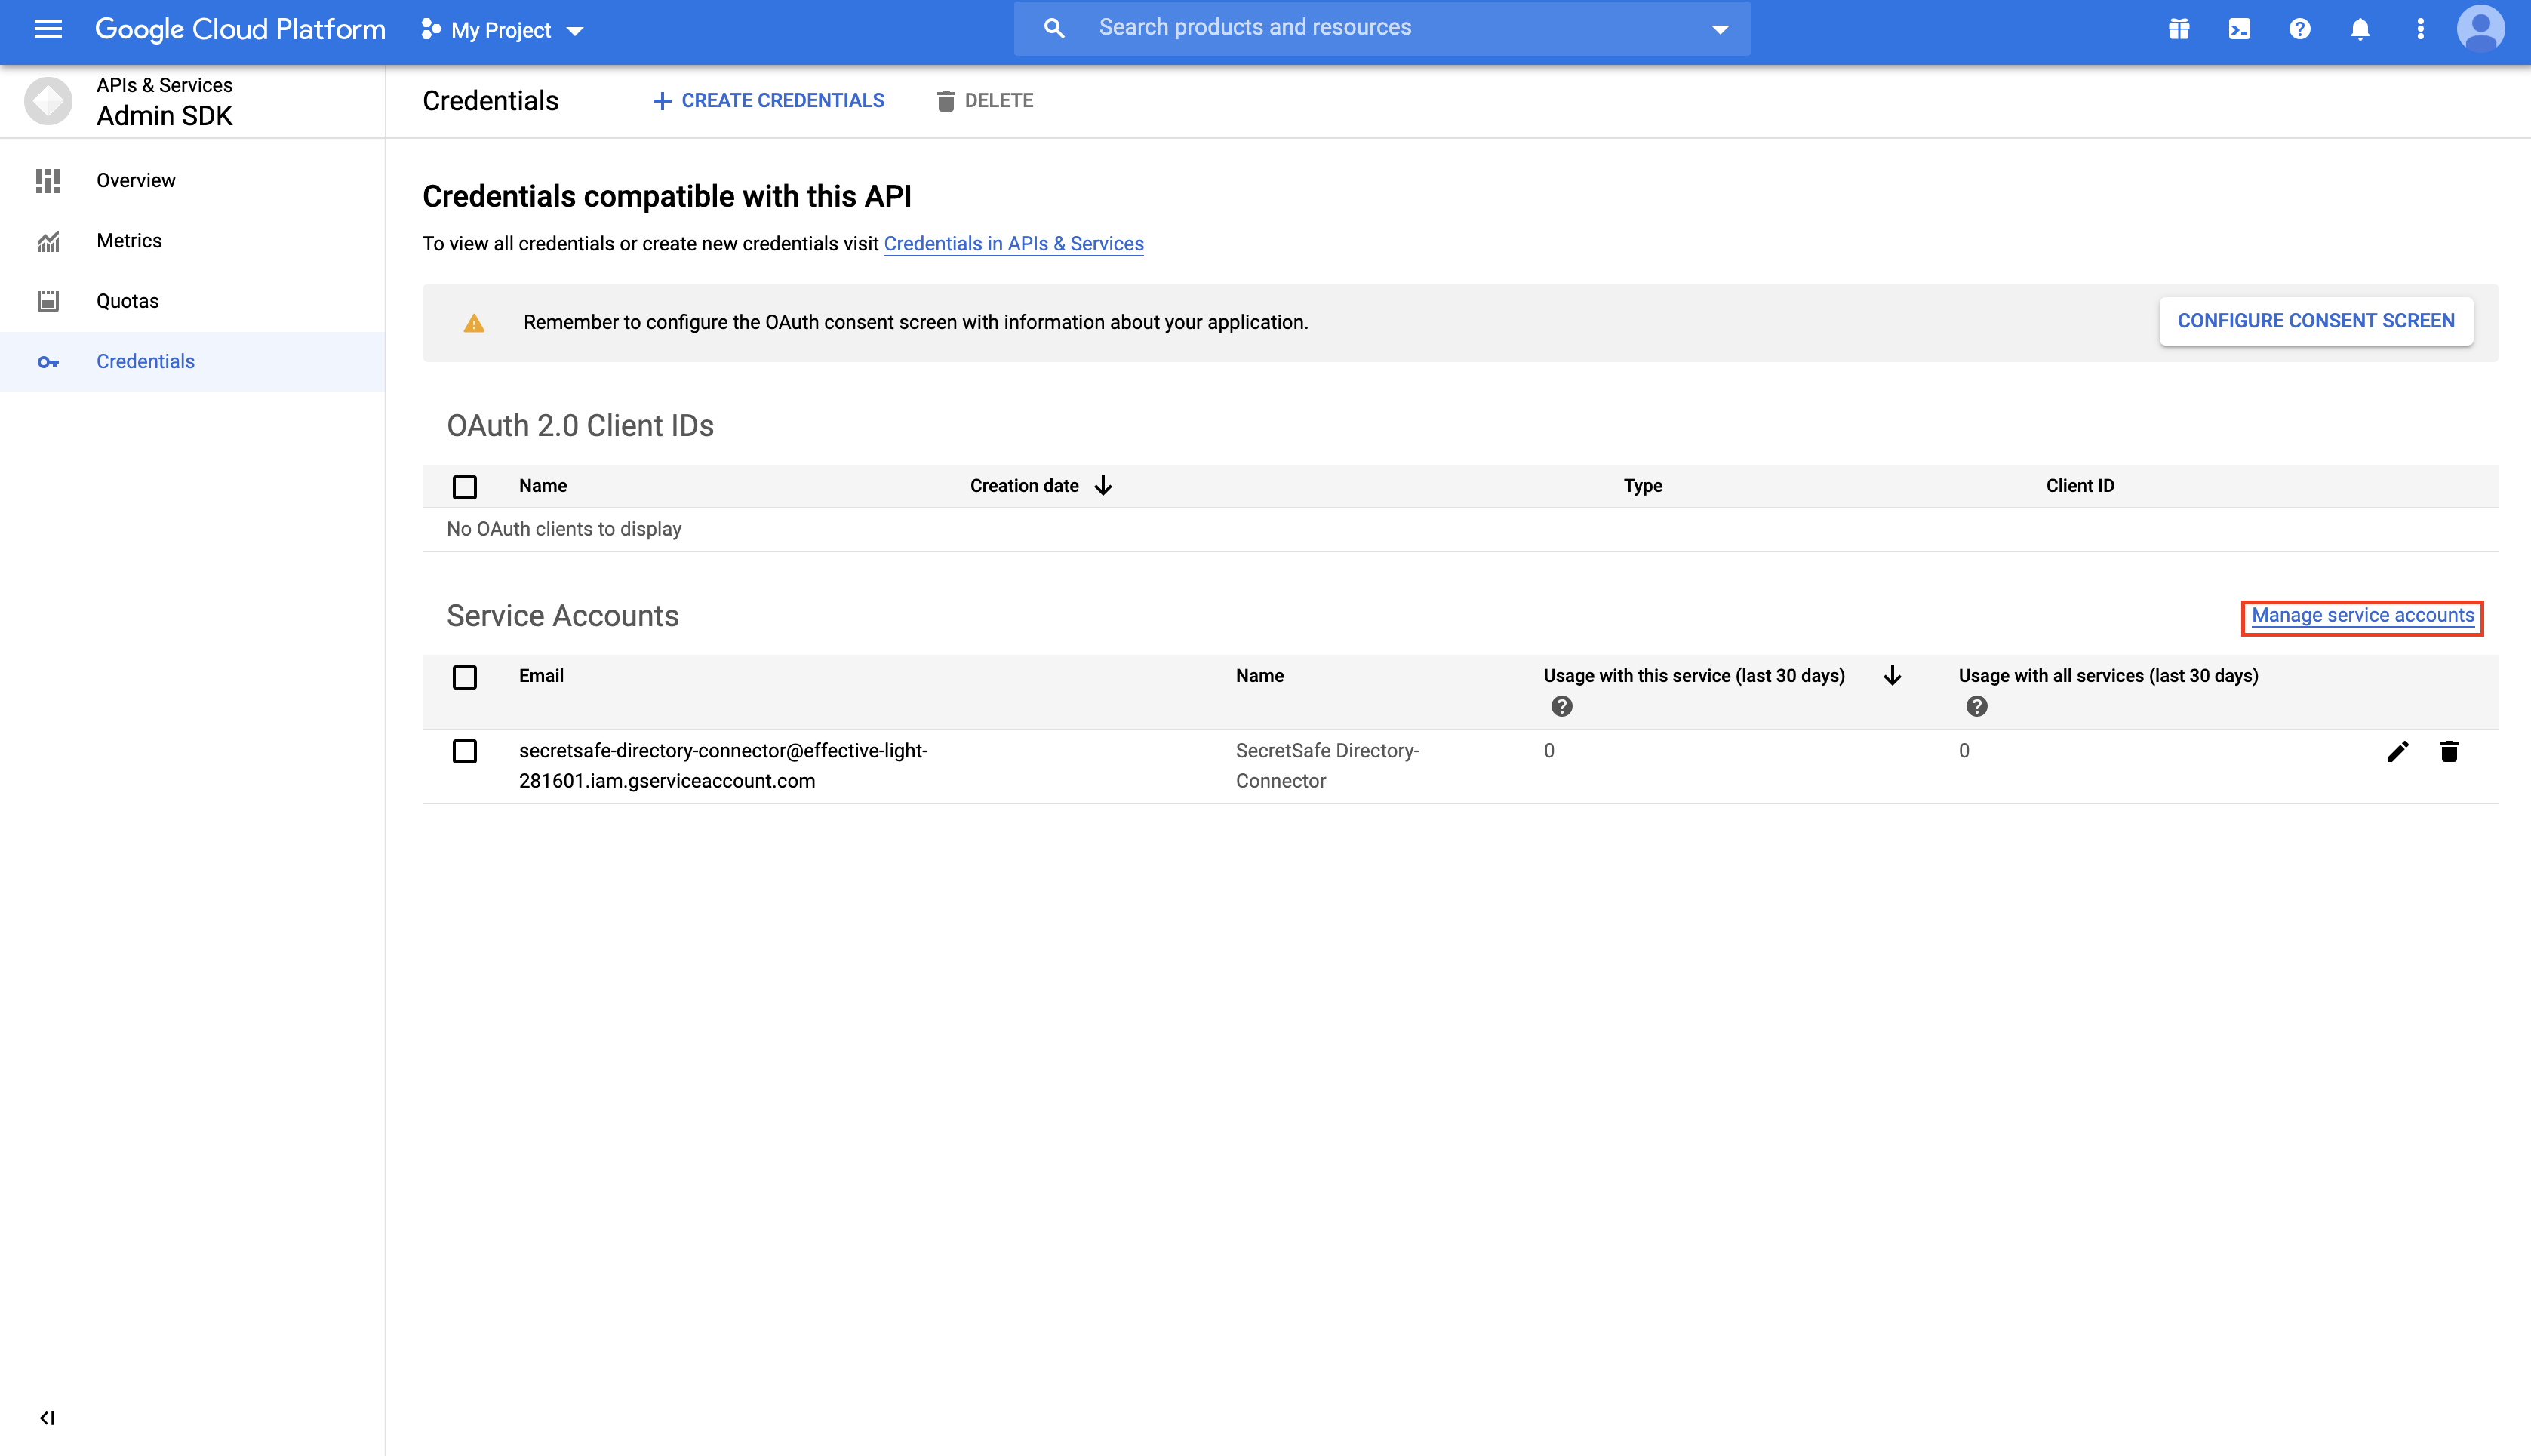
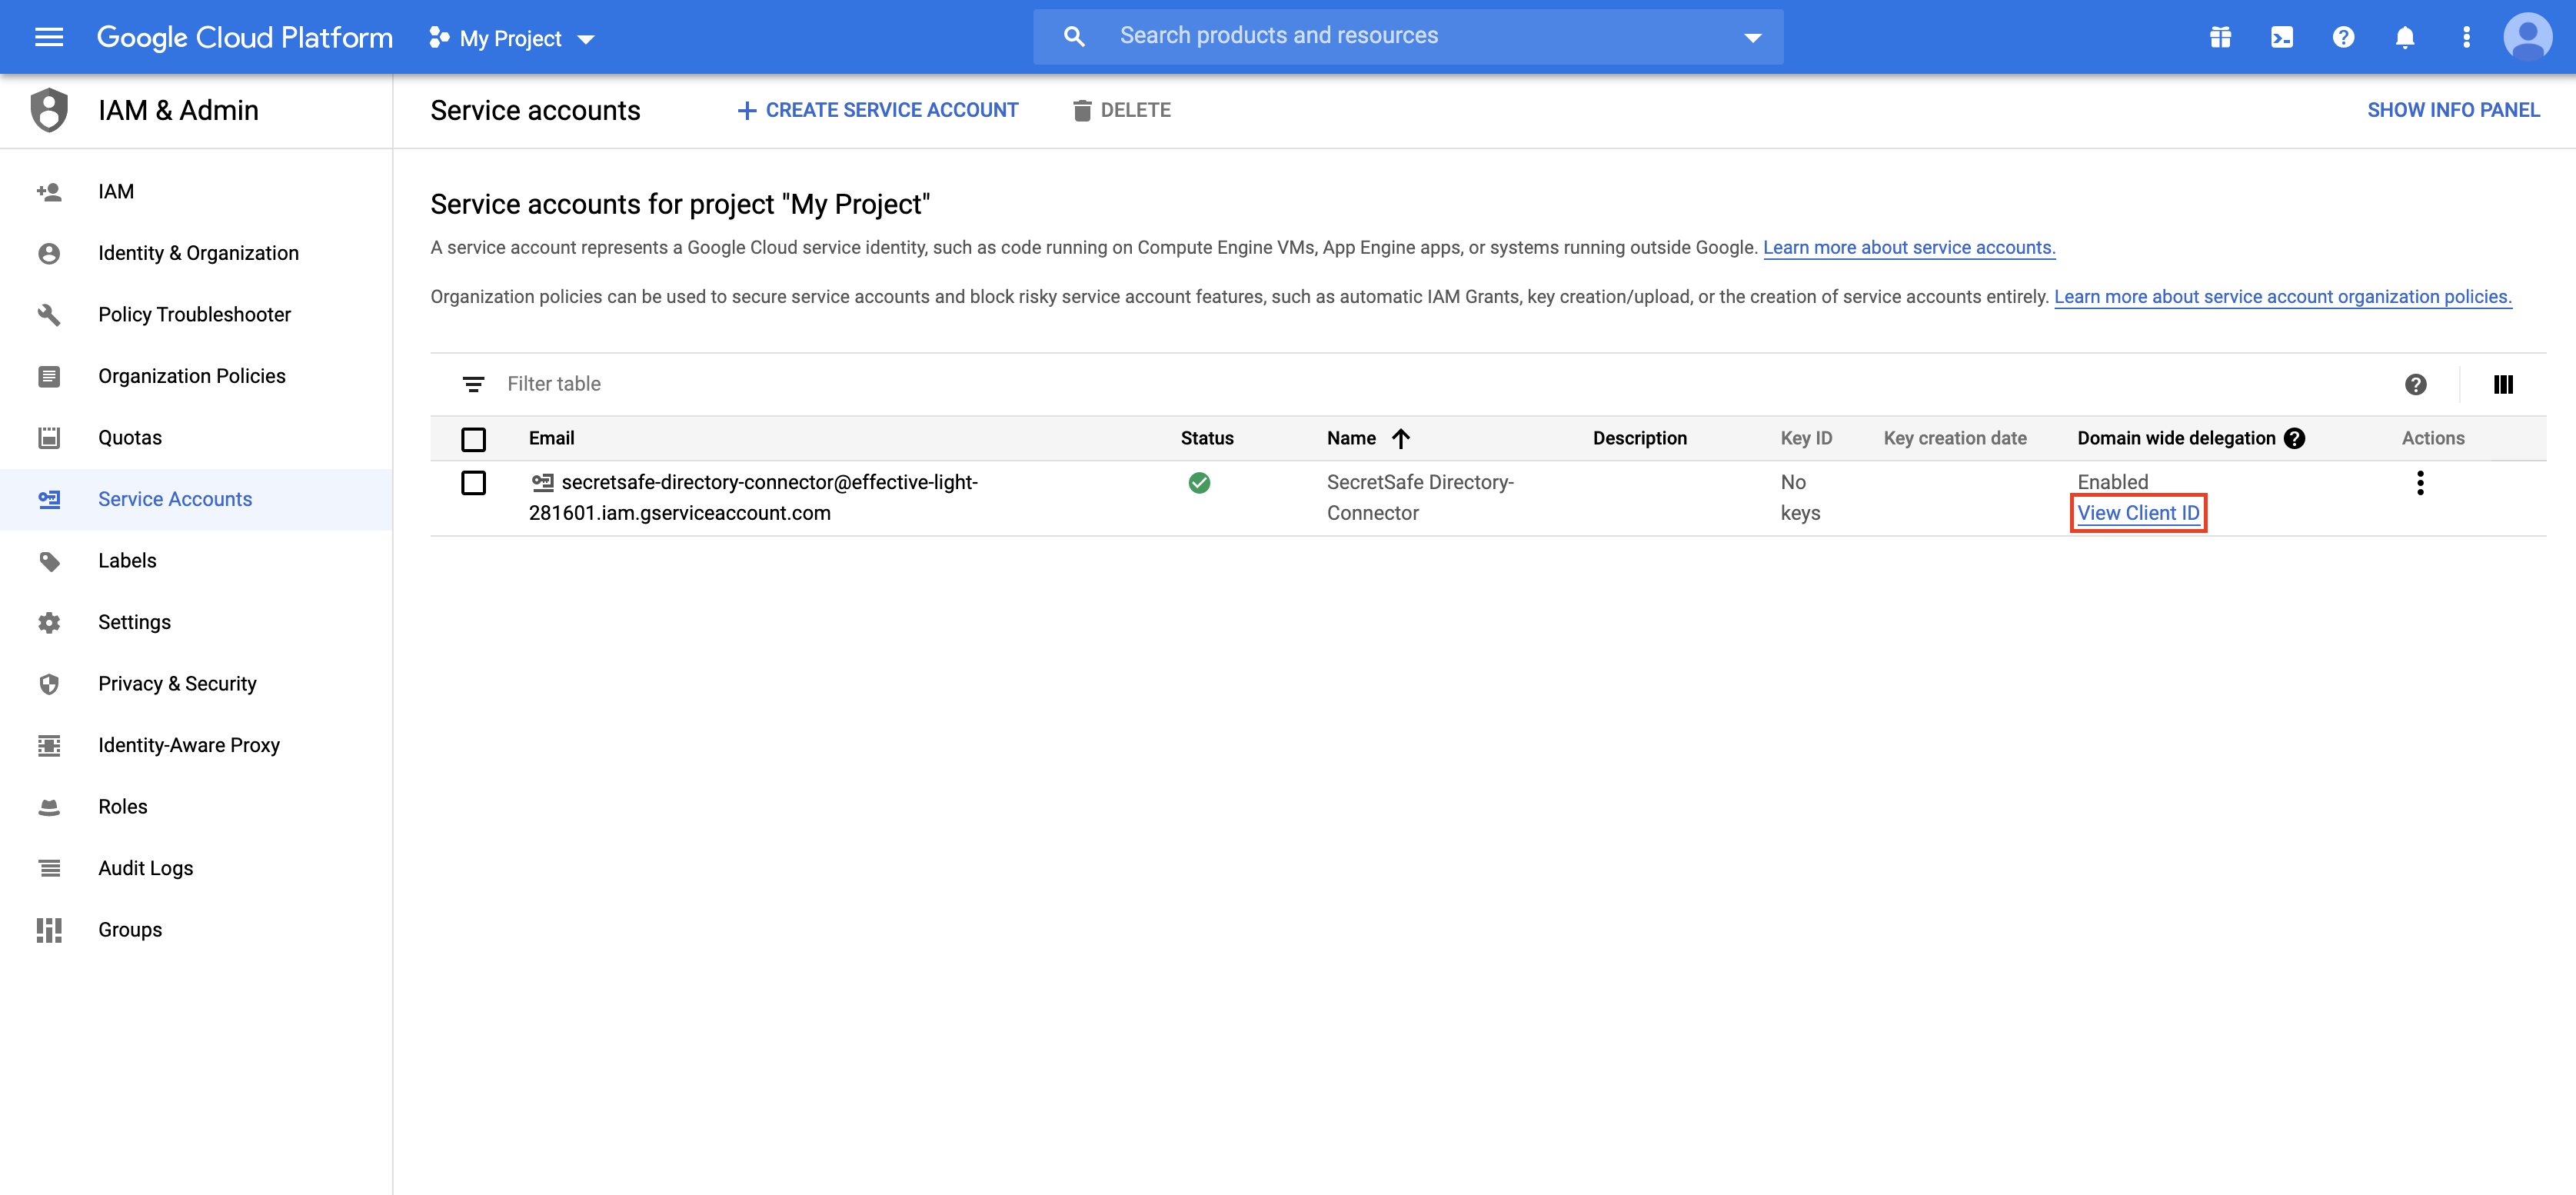
You should now see your newly created service account listed. Click on Manage service accounts (on the right-hand side).
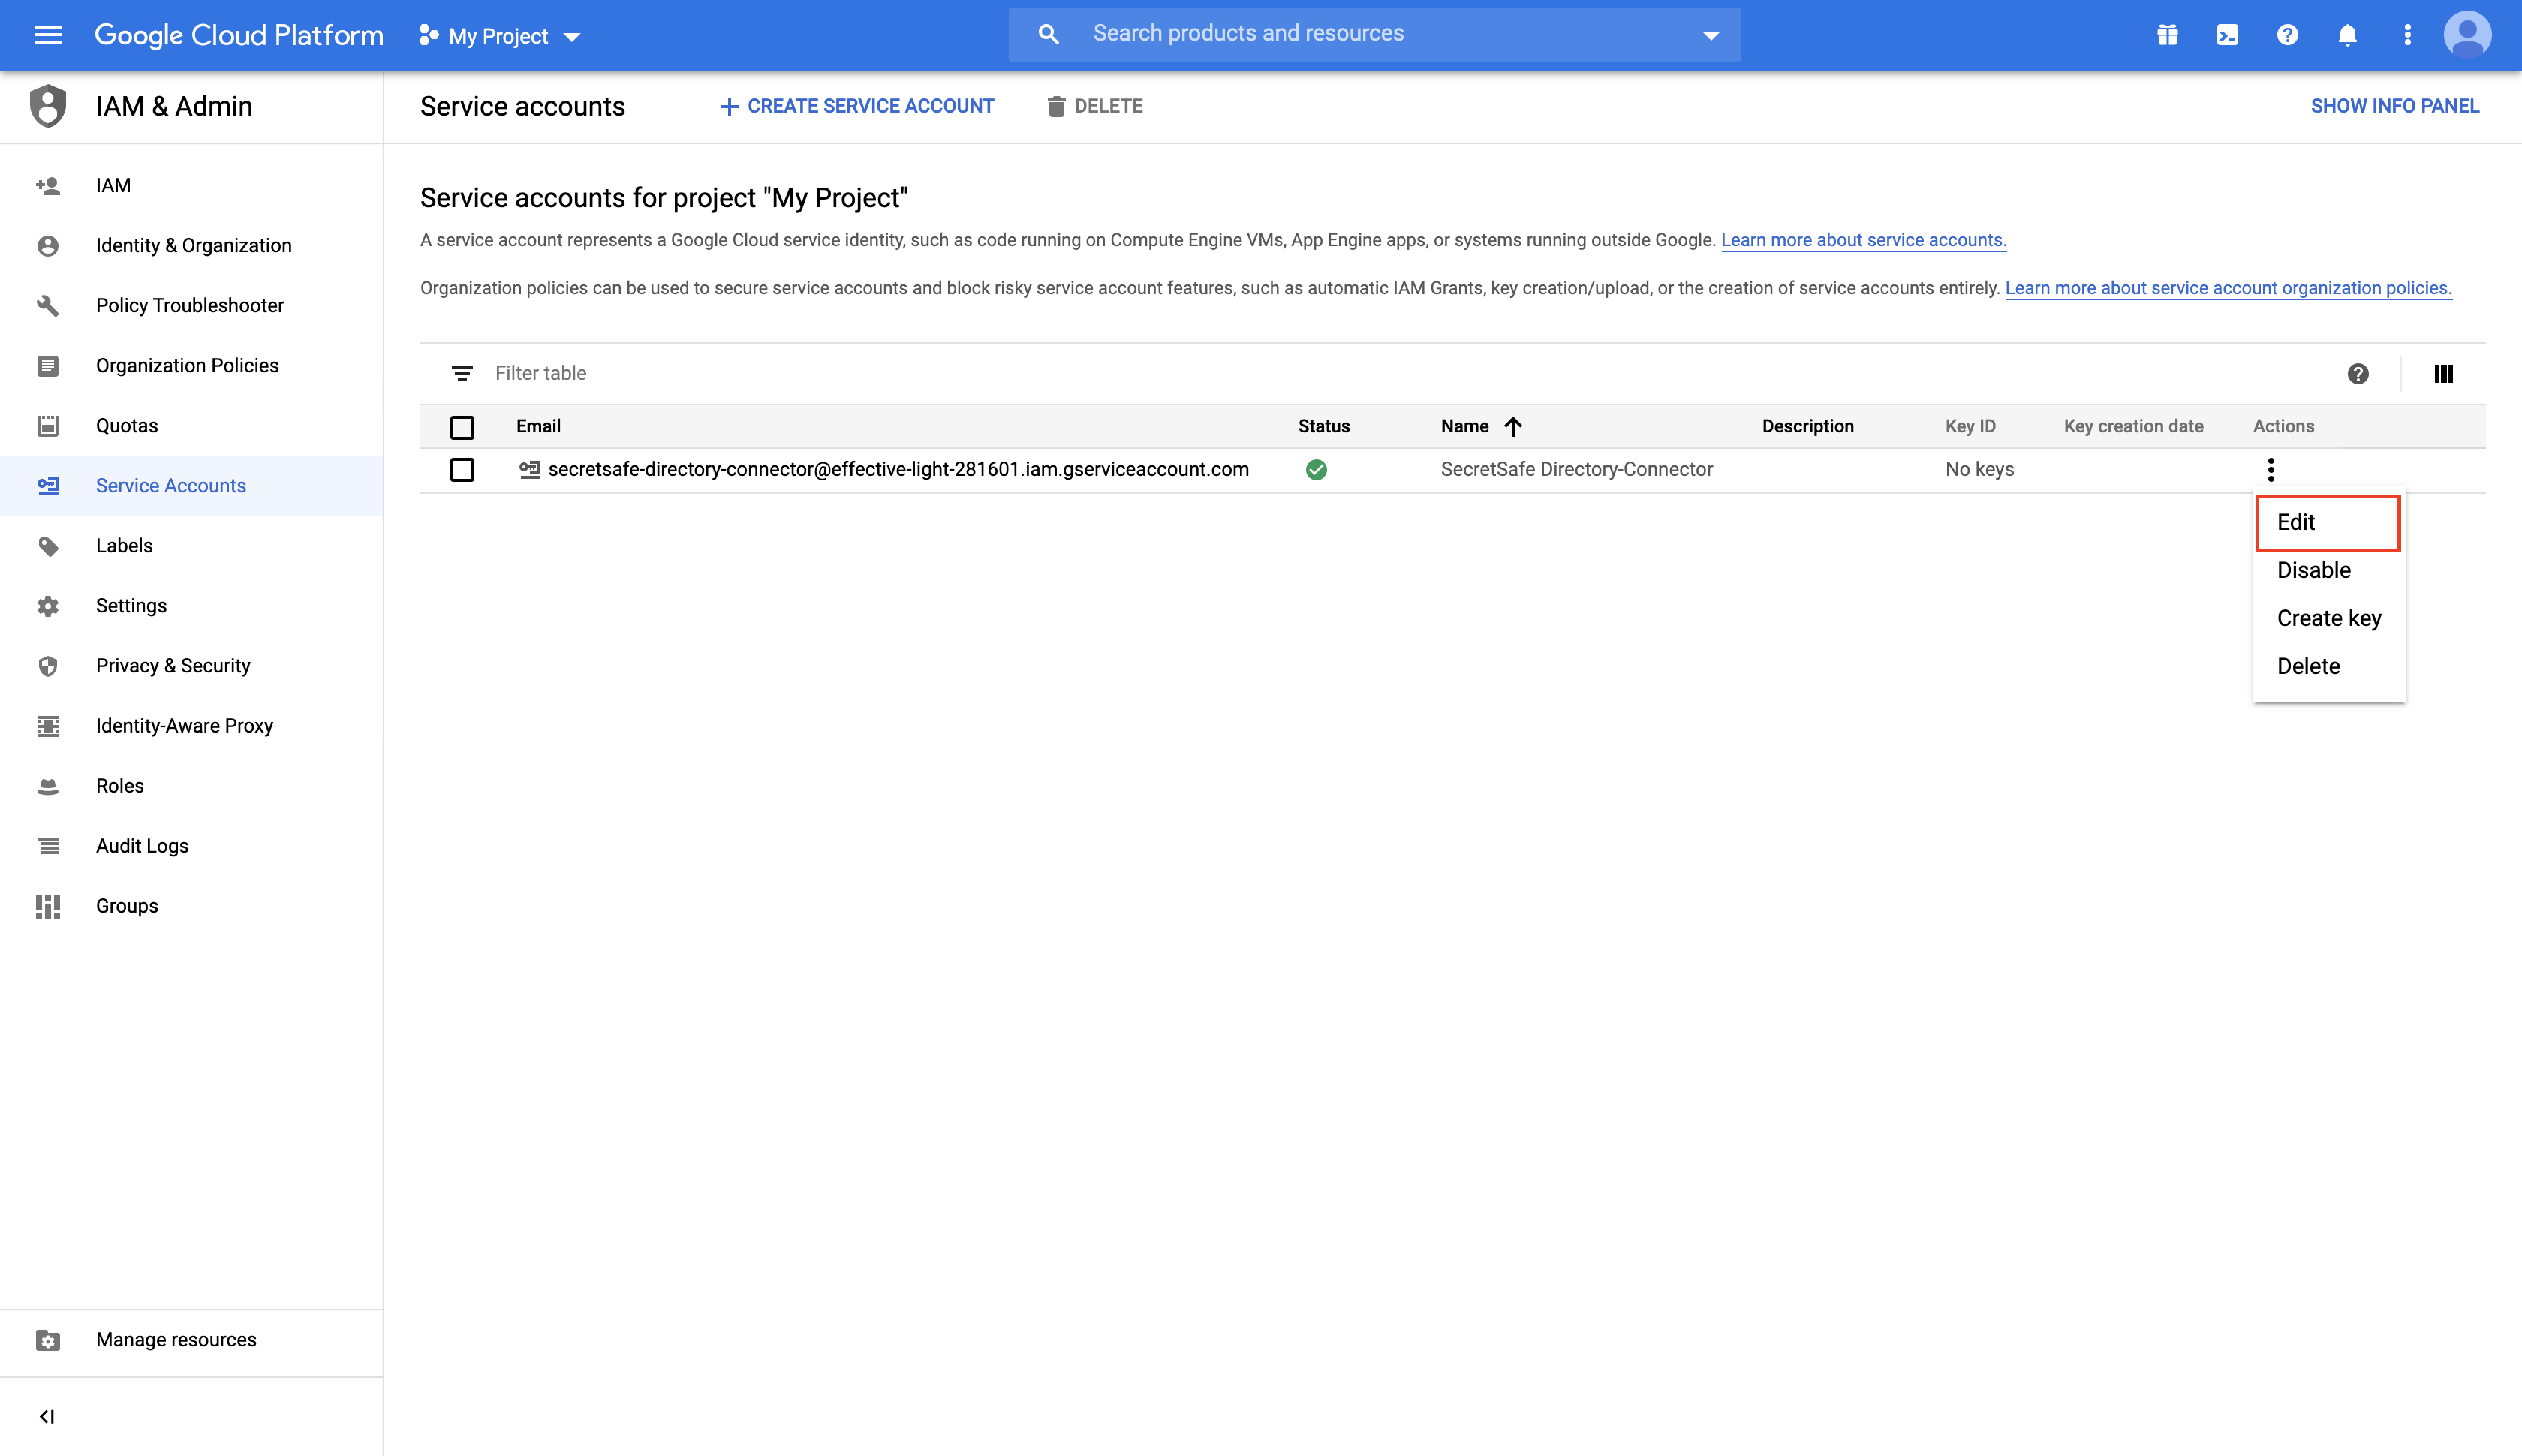
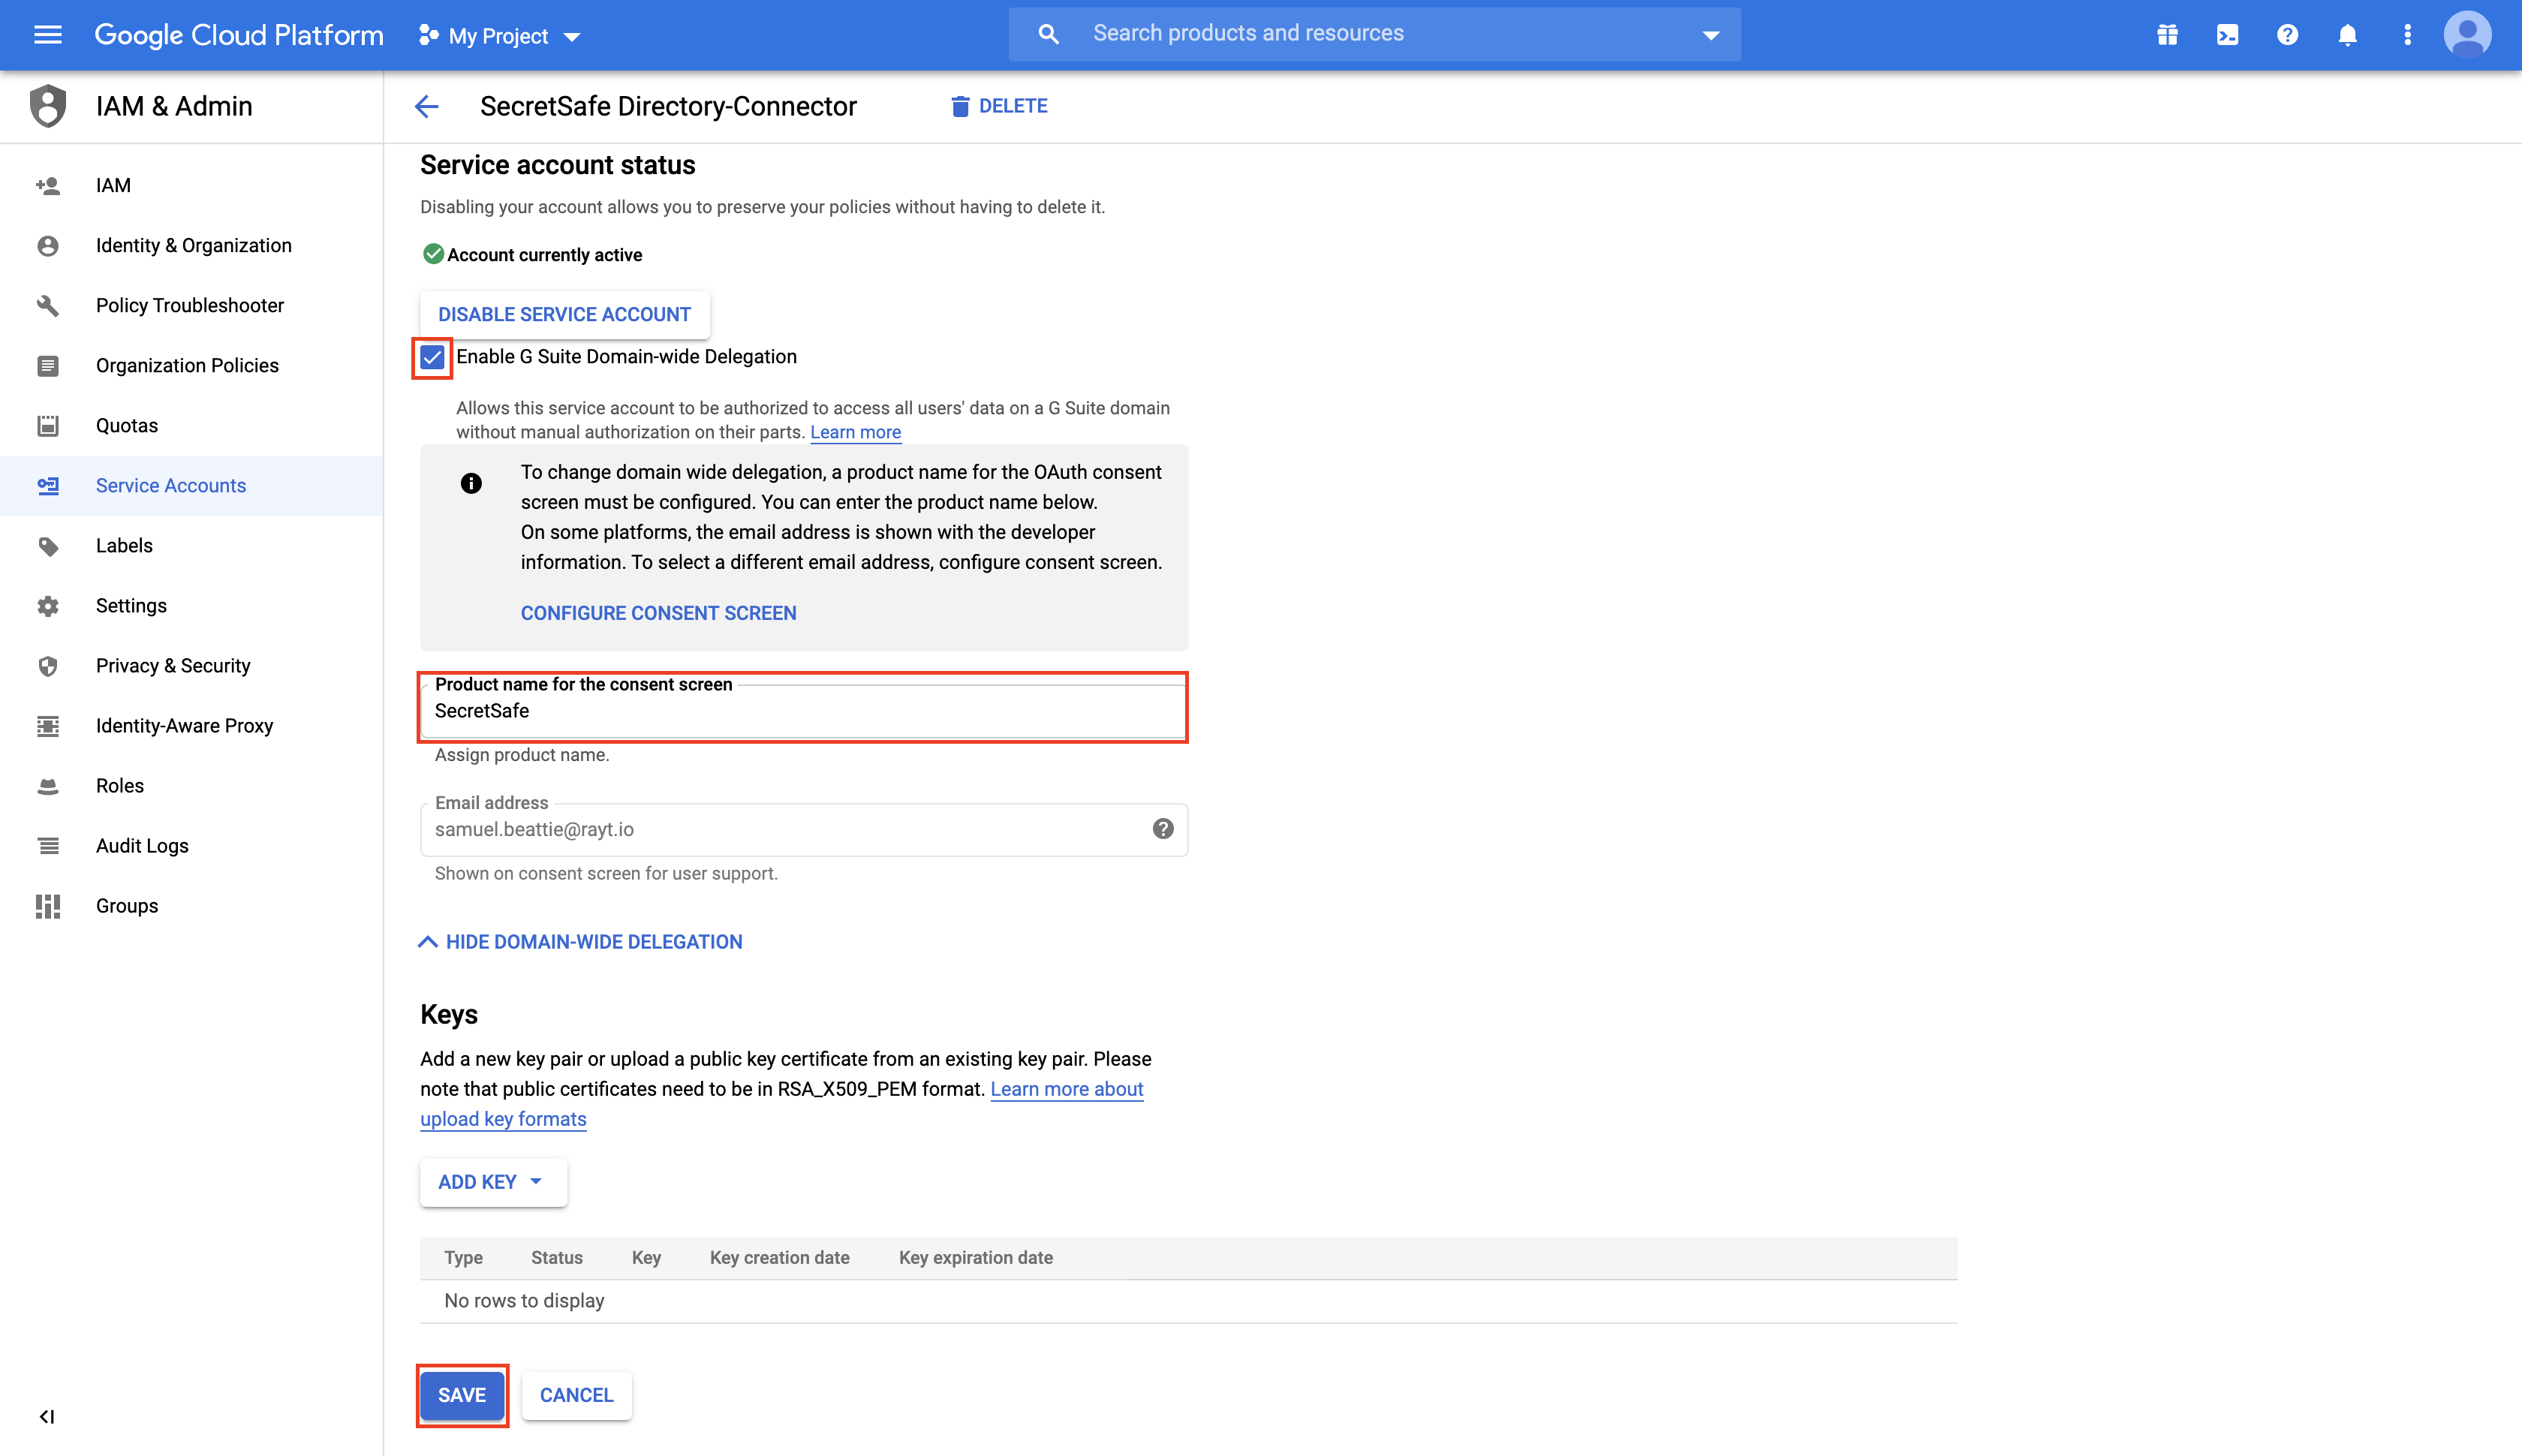
Select the options button next to your service account, and select Edit.
Check the box "Enable G Suite Domain-wide Delegation", enter anything for "Product name for the consent screen" and click Save.
note"Enable G Suite Domain-wide Delegation" is only required on some older G Suite accounts. Newer G Suite accounts will automatically have domain-wide delegation enabled for all service accounts. If you do not see the "Enable G Suite Domain-wide Delegation" checkbox option available for your service account, you can assume it is already enabled.
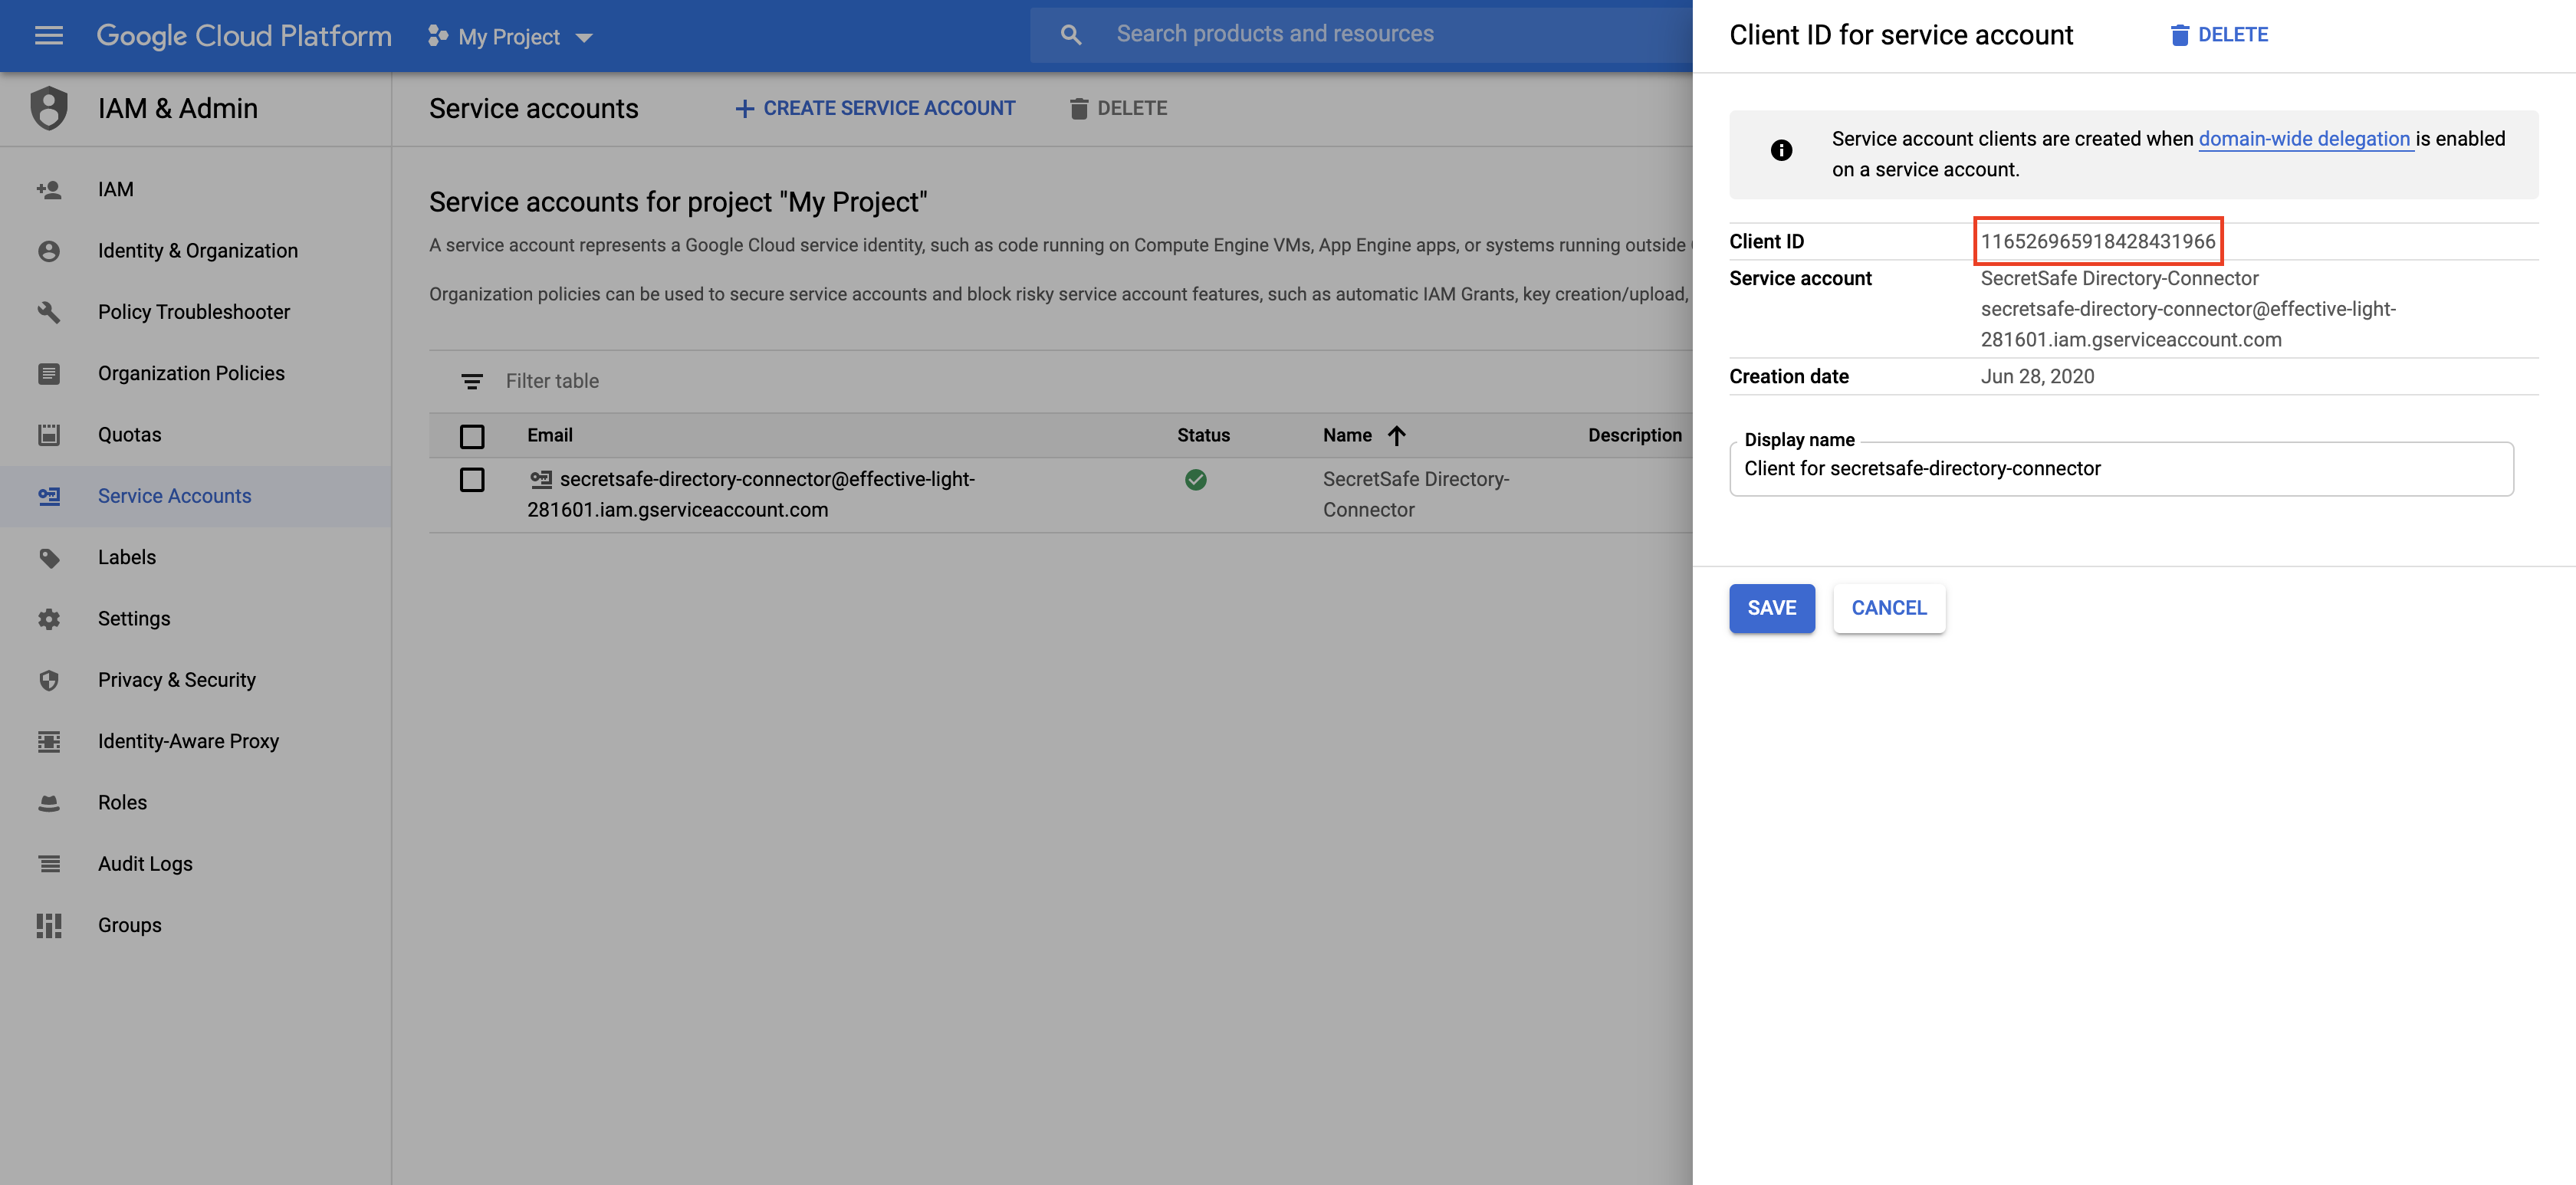
Click View Client ID and you'll see the Client ID on screen. You will need the Client ID to configure security within G Suite. Highlight the Client ID and copy it to your clipboard.
Configure G Suite Security
- Go to https://admin.google.com
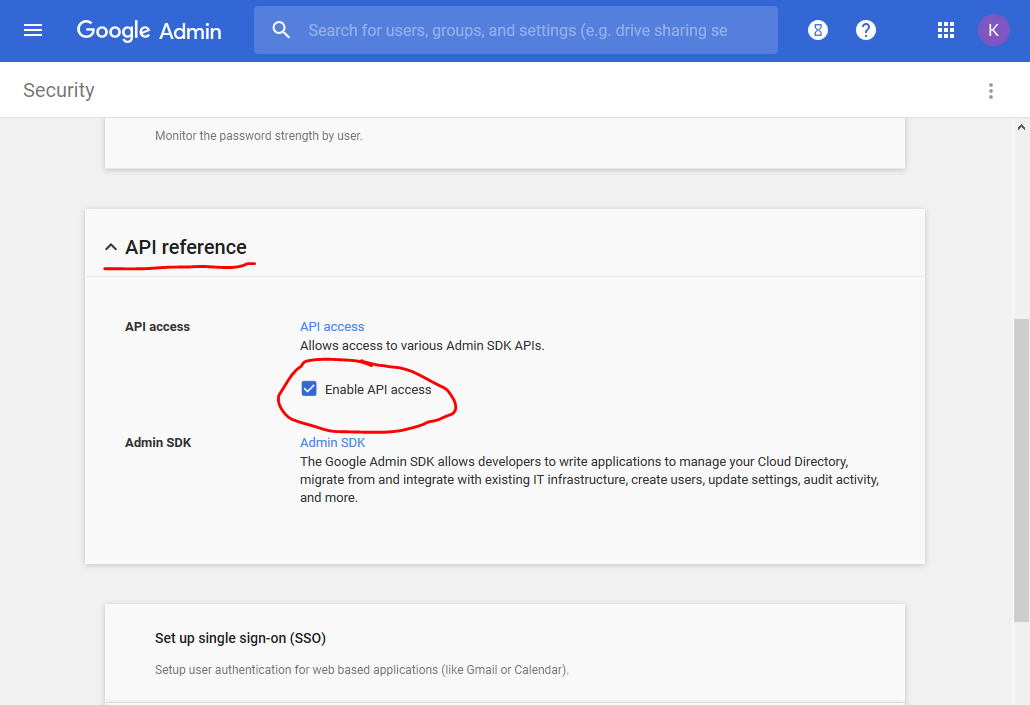
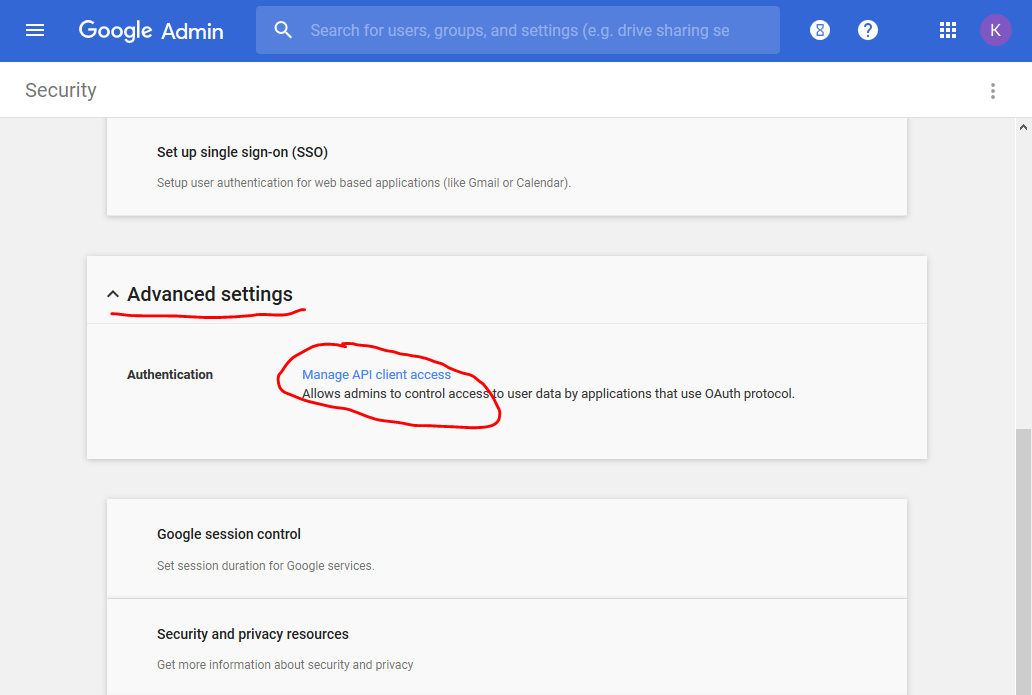
- Open the navigation menu and navigate to Security → Settings.
- Select the API reference option and make sure Enable API access is checked.
- Back in the list of options, select the Advanced settings options and then the Manage API client access link.
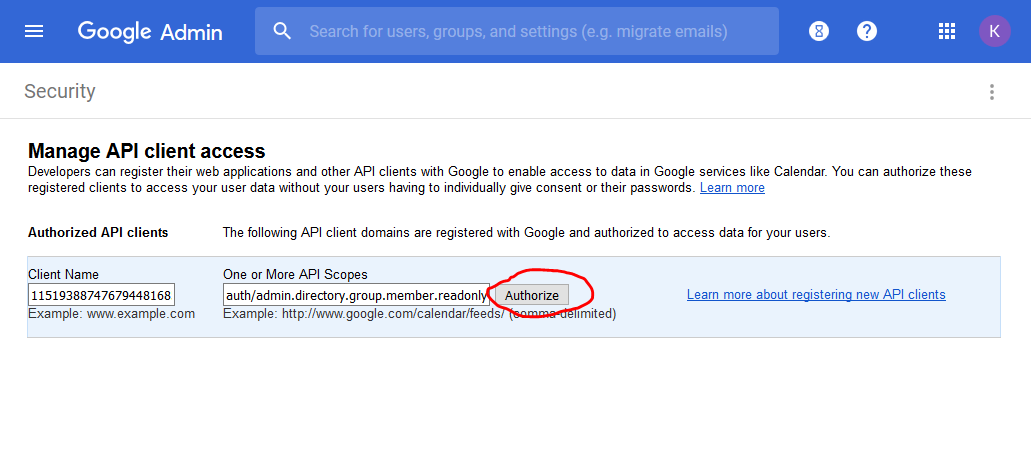
- For Client Name, paste the Client ID of the service account that you created in the previous steps. For API Scopes, paste the following values to grant read-only access to users and groups:
https://www.googleapis.com/auth/admin.directory.user.readonly,https://www.googleapis.com/auth/admin.directory.group.readonly,https://www.googleapis.com/auth/admin.directory.group.member.readonly - Click the Authorize button to save.
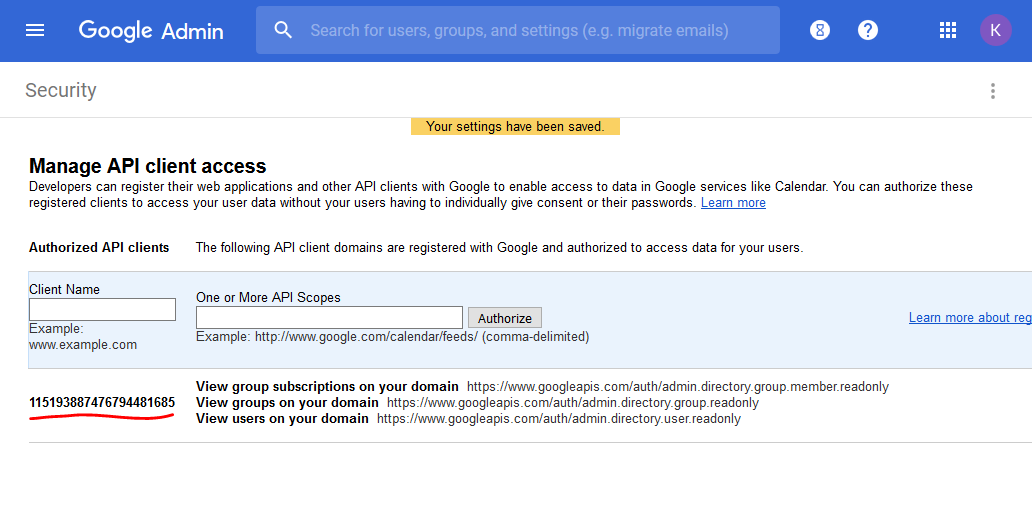
- You should now see your service account listed as an authorized client of G Suite.
Configure Directory Connector
- Launch the Directory Connector desktop application.
- Go to the Settings tab.
- Select G Suite Directory as the directory type.
- Enter the Domain of your G Suite account.
- Enter the email address of an Admin User that has full access to the G Suite directory (such as your own).
- If you have one, enter the Customer Id of your directory (most users won't need to enter a Customer Id).
- Select the JSON Key File that was downloaded whenever you created your service account in the steps above. The Client Email and Private Key will be automatically extracted from this key file for you.
Congrats! You are done configuring G Suite with the SecretSafe Directory Connector.
Testing
Test your configuration by running a sync test. You should see your G Suite groups and/or users printed to the screen.